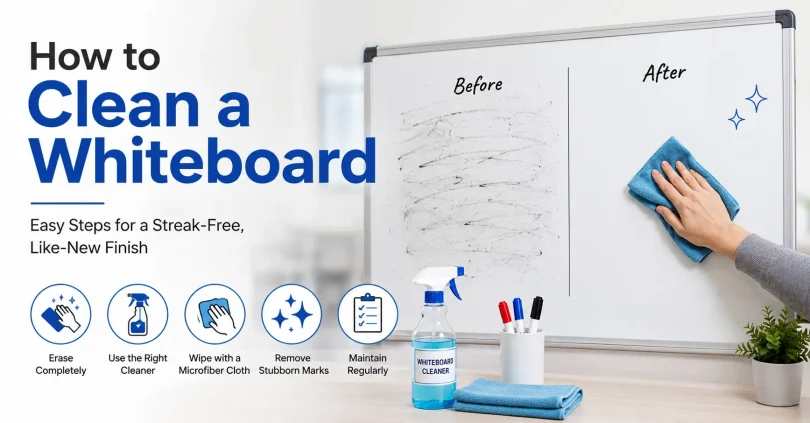
How to Clean a Whiteboard. A whiteboard looks simple until it stops erasing cleanly. Faint shadows build up behind every wipe, markers stop gliding, and the board starts to look permanently dirty no matter how hard you scrub. This happens to almost every whiteboard eventually, whether it sits in a classroom, an office, or a home study.
This guide covers the full picture: quick daily cleaning, removing stubborn ghosting, restoring an old board that seems beyond saving, and the specific mistakes that damage a whiteboard’s surface permanently. You will also find guidance most other articles skip, including how to clean the eraser itself, how board material changes your approach, and how to handle permanent marker by accident.
Why Whiteboards Get Ghosting and Stains
Ghosting is the faint, shadowy residue left behind after erasing. It happens because dry erase ink is designed to sit on top of the board’s surface, not soak into it. Over time, several things cause that ink to bond more permanently:
- Marker ink left on too long: the longer ink sits before erasing, the more it dries into the surface and resists a simple wipe.
- Dirty erasers: an eraser that is never cleaned just moves old ink around and grinds it back into the board instead of lifting it off.
- Sunlight and heat exposure: UV light and warm rooms can bake marker ink into the surface faster.
- Low-quality or worn coating: cheap melamine boards have a thinner surface layer that wears down with heavy use, while porcelain and glass boards resist staining far longer.
- Using the wrong cleaning products: abrasive cleaners and degreasers can scratch or strip the coating, creating tiny grooves where ink gets trapped permanently.
What You Will Need
You do not need expensive commercial whiteboard spray to get a clean result. Here is what actually works, based on cleaning method and materials that show up consistently in real-world use.
- Microfiber cloths: the single most recommended tool across experienced whiteboard users. They lift ink without scratching, unlike paper towels or rough rags.
- Isopropyl alcohol (70 percent): the most widely trusted everyday cleaner for dry erase surfaces, since dry erase ink itself is alcohol-based.
- A spray bottle: for applying diluted alcohol evenly instead of soaking the cloth directly.
- White, non-gel toothpaste: useful for stubborn, long-term stains and ghosting on older boards. Avoid gel or colored toothpaste.
- WD-40 (optional): effective for resurfacing badly ghosted boards, though it has a strong odor and should be used sparingly and only when needed.
- Warm water and mild dish soap: a gentler, low-odor option for daily cleaning or for boards used around children.
Avoid ammonia-based glass cleaners as your main method. While a few users report success, ammonia can dull certain coatings over repeated use. If you choose to use a glass-based cleaner, test it on a small corner first.
Daily and Weekly Cleaning: Step by Step
Most whiteboards only need this level of care to stay in good condition long term.
- Erase the board fully using a clean, dry eraser or microfiber cloth before applying any liquid.
- Lightly spray a microfiber cloth with 70 percent isopropyl alcohol. Do not spray the board directly, since pooling liquid can seep into the edges or tray.
- Wipe the board in straight, overlapping lines rather than small circles, which helps avoid streaking.
- Flip to a clean section of the cloth as it picks up ink, and switch cloths if one becomes saturated.
- Let the board air-dry for a minute before writing on it again.
- Frequency: wipe high-use boards, such as classroom or meeting-room boards, daily. Lighter-use home or personal boards can be cleaned weekly.
- Erase old content promptly: the number one habit that prevents ghosting is simply not letting written content sit for days or weeks before erasing it.
How to Remove Stubborn Ghosting
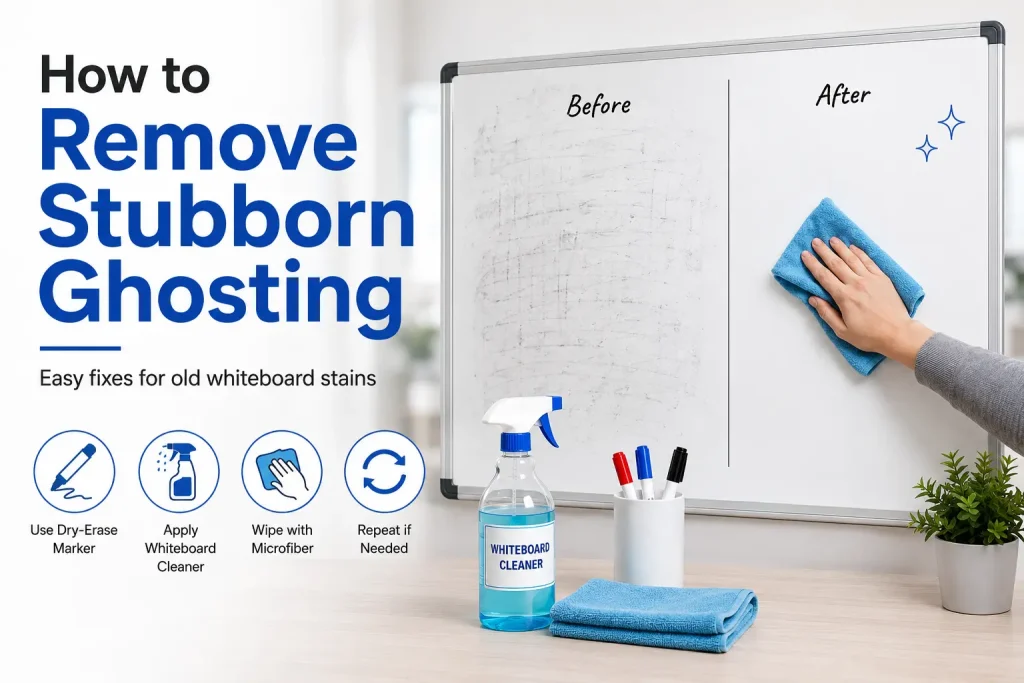
If daily wiping is no longer cutting it and shadows remain after erasing, move to a deeper clean.
Method 1: Isopropyl Alcohol Soak
- Saturate a microfiber cloth with 70 to 91 percent isopropyl alcohol.
- Rub the ghosted area firmly in small circles, applying steady pressure.
- Let the alcohol sit on stubborn spots for thirty seconds before wiping again.
- Repeat with a fresh section of cloth until the shadow lifts.
Method 2: Toothpaste for Long-Term Stains
This method works especially well for stains that are months or years old and have resisted alcohol alone.
- Apply a small amount of plain white, non-gel toothpaste directly onto the stained area.
- Rub it in with a clean, slightly damp cloth using small circular motions.
- Continue until the toothpaste has lifted the stain onto the cloth.
- Wipe the area clean with isopropyl alcohol to remove any leftover toothpaste residue and restore a smooth feel.
- Dry completely before writing on the board again.
Toothpaste contains mild abrasives that lift stains, but it is not meant for daily use. Reserve it for occasional deep cleaning, not routine wiping.
How to Restore a Badly Damaged or Very Old Whiteboard
If a board no longer erases cleanly no matter what you try, it may need a full resurfacing rather than a simple clean. This works well on old, heavily used boards, but should never be used on a newer board that still erases properly, since it can alter the existing coating.
- Erase the board as much as possible with a dry eraser to remove surface-level marks.
- Apply white, non-gel toothpaste in small sections and rub with a cloth until stains lift, working across the entire board.
- Wipe the whole board down with isopropyl alcohol until it feels completely smooth, with no leftover toothpaste texture.
- Make sure the board is fully dry before moving to the next step.
- Spray a light, even coat of WD-40 across the board using a paper towel to spread it, covering every section.
- Let the coating sit for at least two hours, ideally longer, so it can settle into the surface.
- Wipe off all excess WD-40 with clean paper towels until the surface no longer smudges when you run a finger across it.
- Why this works: old, worn whiteboard coatings develop microscopic pores where ink gets trapped. A light oil-based coating fills those pores, giving the board a smoother, more stain-resistant surface again.
- Test your markers first: after resurfacing, some marker colors, particularly reds and dark blues, may behave differently. Test a small corner before writing normally again.
- This is not permanent: expect to repeat a full restoration once every few months to a year, depending on how heavily the board is used.
Cleaning the Eraser Itself
This is one of the most overlooked steps in whiteboard care, and skipping it undoes much of your cleaning effort.
- Why it matters: a dirty eraser does not remove ink, it just redistributes old ink back onto the board every time you use it.
- How to clean a felt eraser: vacuum loose dust off the felt, then wipe it with a cloth dampened in isopropyl alcohol to lift embedded ink.
- How often to clean it: clean the eraser at least as often as you deep-clean the board itself, and replace it once the felt becomes hard or caked with ink that will not lift.
- Simple alternative: many long-term whiteboard users skip traditional felt erasers entirely and use a clean, dry microfiber cloth instead, since it does not trap and reapply old ink the way a worn eraser can.
What to Avoid When Cleaning a Whiteboard
Some very common habits and products cause long-term damage, even though they seem harmless.
- Abrasive scrub pads or melamine sponges: these work by micro-sanding the surface, which can permanently scratch the coating and create grooves where ink becomes trapped for good.
- Paper towels for everyday wiping: they shed fibers, are less absorbent for ink, and can leave lint behind, unlike microfiber cloths.
- Bleach-based or heavily acidic cleaners: these can discolor or degrade certain board coatings over repeated use.
- Wax-based products: furniture wax, floor wax, and similar coatings can seal marker ink into the surface, turning what should be temporary writing into something close to permanent.
- Old, hardened erasers: a felt eraser that has gone stiff behaves almost like sandpaper against the board.
- Tape of any kind: adhesive residue from tape can damage the coating and is very difficult to remove without harming the surface underneath.
- Leaving marker on for weeks: the single biggest cause of permanent ghosting is simply letting written content sit far too long before erasing.
Accidentally Used a Permanent Marker? Here Is the Fix
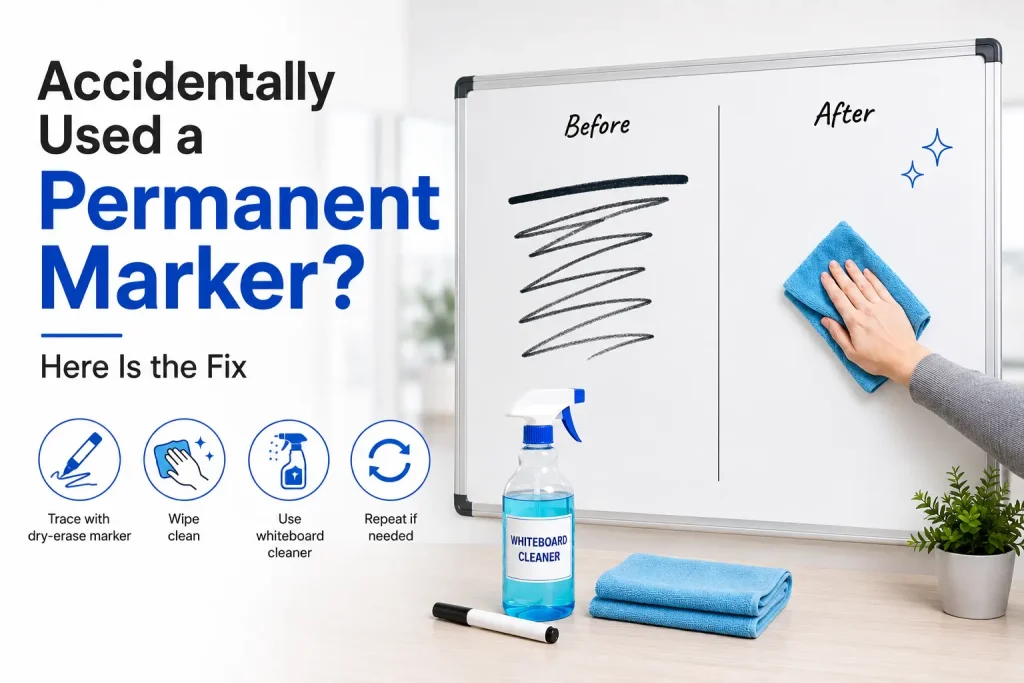
This happens more often than people expect, especially in shared spaces. The fix is usually simple.
- Trace directly over the permanent marker lines with a regular dry erase marker.
- Wait about ten seconds without letting it dry completely.
- Wipe the area immediately with a cloth or eraser. The dry erase marker’s solvent helps lift the permanent ink along with it.
- Repeat if any trace remains, then finish with an isopropyl alcohol wipe to clean the area fully.
Does Whiteboard Material Change How You Should Clean It?
Most cleaning advice online treats all whiteboards the same, but the material matters.
- Melamine boards: the most common and most affordable type, but also the most prone to ghosting and scratching over time. These benefit most from gentle, frequent cleaning and occasional restoration.
- Porcelain (enamel) boards: far more scratch and stain resistant, commonly used in schools and offices for heavy daily use. These handle isopropyl alcohol and regular cleaning well with minimal ghosting.
- Glass boards: highly resistant to staining and ghosting, and generally the easiest to keep looking new. Simple alcohol or glass cleaner works well here.
- Painted or repurposed surfaces: some whiteboard paint or laminate products behave more like melamine and need gentler treatment to avoid damaging a thin coating.
How to Prevent Ghosting Before It Starts
- Erase daily or after each use, rather than letting written content build up over days or weeks.
- Use quality dry erase markers, since low-quality or dried-out markers tend to leave a stickier residue that is harder to remove.
- Keep the eraser and cloths clean, so you are lifting ink off the board instead of grinding it back in.
- Avoid direct sunlight on the board, since heat and UV exposure make ink bond to the surface faster.
- Wipe with alcohol weekly, even if the board looks clean, as a preventative habit rather than a reactive fix.
Common Mistakes to Avoid
- Scrubbing hard with an abrasive pad, which feels effective short-term but scratches the surface permanently.
- Using a dirty eraser, which reapplies old ink instead of removing it.
- Spraying cleaner directly onto the board, which can seep into the edges, tray, or mounting hardware.
- Ignoring small ghosting early on, since it becomes much harder to remove the longer it is left untreated.
Assuming one method works for every board, when material, age, and usage level all affect the best approach.
Frequently Asked Questions
What is the best everyday cleaner for a whiteboard?
A microfiber cloth lightly sprayed with 70 percent isopropyl alcohol works best for regular cleaning.
Can I use vinegar to clean a whiteboard?
Diluted vinegar can work for light cleaning, but it is less effective than isopropyl alcohol on dried, stubborn ink.
Why does my whiteboard still look dirty after wiping?
This is ghosting, caused by ink residue bonded to the surface. Use the toothpaste or alcohol deep-clean method described above.
Is WD-40 safe for whiteboards?
Used sparingly and wiped off completely, WD-40 can resurface an old, heavily ghosted board. Avoid using it on newer boards that still erase well.
How often should I clean my whiteboard?
Wipe high-use boards daily and do a deeper alcohol clean weekly. Light-use boards can be cleaned weekly with a deep clean monthly.
Can permanent marker be removed from a whiteboard?
Yes, in most cases. Trace over it with a dry erase marker, then wipe it away immediately.
Final Thoughts
A whiteboard stays clean and functional far longer when it gets a little regular care instead of a rescue mission every few months. Wipe it often, keep your eraser and cloths clean, and reach for isopropyl alcohol or toothpaste when ghosting builds up. If a board seems beyond saving, a full resurfacing with WD-40 can bring even a heavily worn whiteboard back to a usable, smooth condition. With the right habits, one whiteboard can last for years without ever needing replacement.
You May Also Like It: